


NXP LPC54018 + FreeRTOS + LWIP
Overview
This example shows how to build an HTTP server using Mongoose Library and run it on an NXP LPC54S018 development board with FreeRTOS and lwIP.
The source code for this tutorial is located at https://github.com/mongoose-examples/nxp-lpcxpresso54s018m-freertos
Project structure
A big part of this example is a regular MCUXpresso IDE project (a lot of generated
files, FreeRTOS and lwIP sources, etc.). Mongoose-related functions are located
in files source/web_server.c and source/web_server.h. Mongoose
itself is located in the source directory as well. Board network
configuration (e.g. IP address) can be found in source/web_server.h
General description
Below is a general process outline:
- First of all, set IP address, network mask and gateway suitable for your network in the
source/web_server.hfile. Default address is192.168.0.10. - Build the example and run it on your development board (see next section).
- The firmware initializes the network
- After initialization, the application starts Mongoose's event loop and blinks an LED
- Once the LED starts blinking - the web server is ready
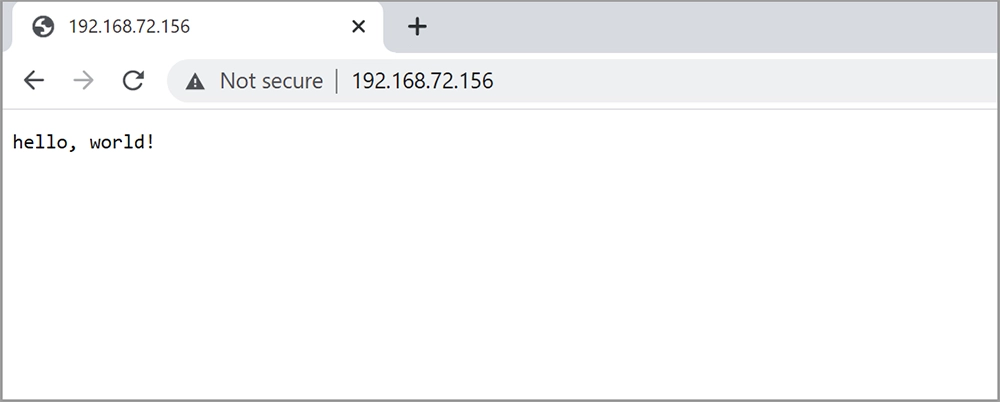
- Open your web browser and navigate to the board IP address, you should see a "Hello, world" page
Build options
There are (at least) two options to build the example:
- Using the
makecommand - Using the MCUXpresso IDE software
Option 1 - make
- Install Docker
- Start a terminal, navigate to the project folder, and from there run
$ make build - When build finishes, flash the board using your favorite tool
Done! See the LEDs to understand the application status
Option 2 - MCUXpresso IDE
MCUXpresso IDE is an IDE software provided by NXP Semiconductor. To build this sample with MCUXpresso IDE you need to do the following steps:
- Start MCUXpresso IDE
- Choose
File -> Open Projects from File System...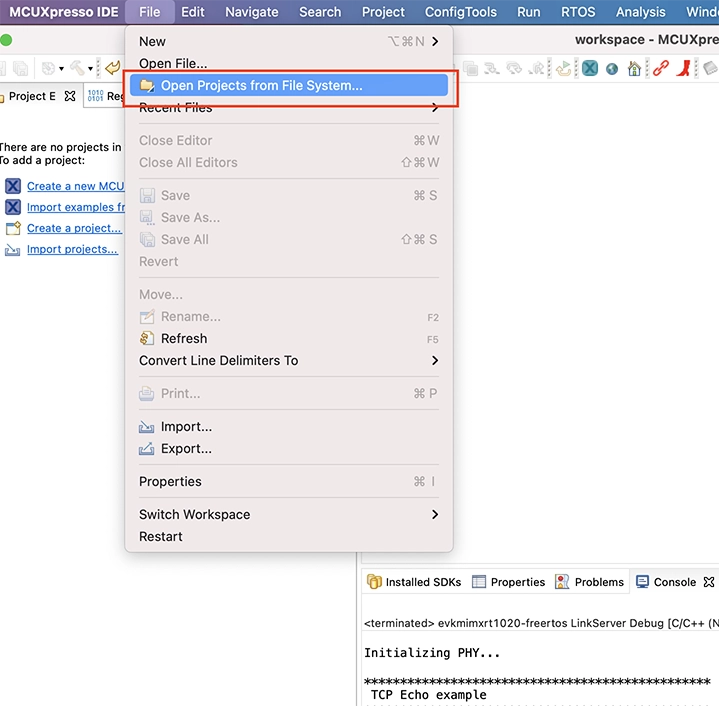
- Pick the project directory as
Import source, make sure thatnxp-lpcxpresso54s018m-freertosis checked, and clickFinish
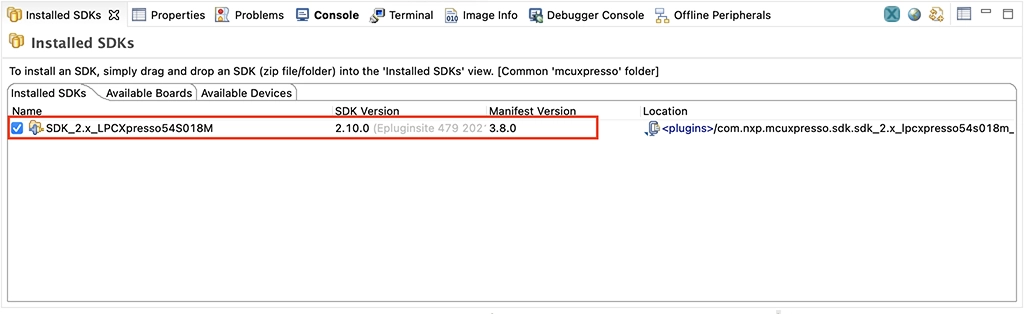
- Check if you have the required SDK installed, if not:
- Press
Install New Plugin SDKs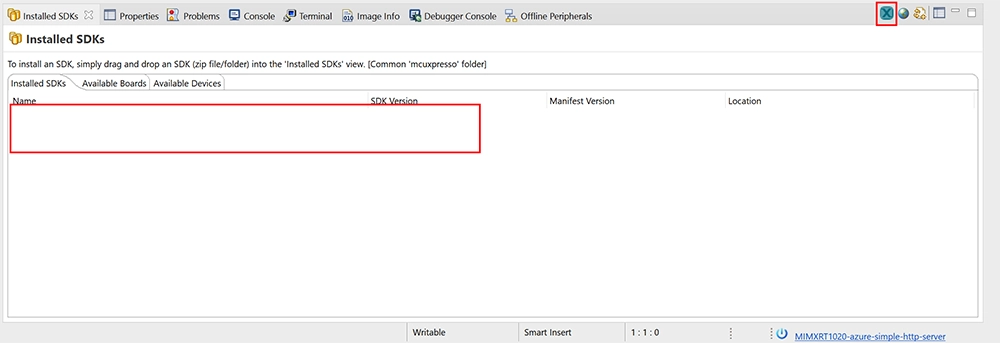
- In the board list choose
lpcxpresso54s018mand pressInstall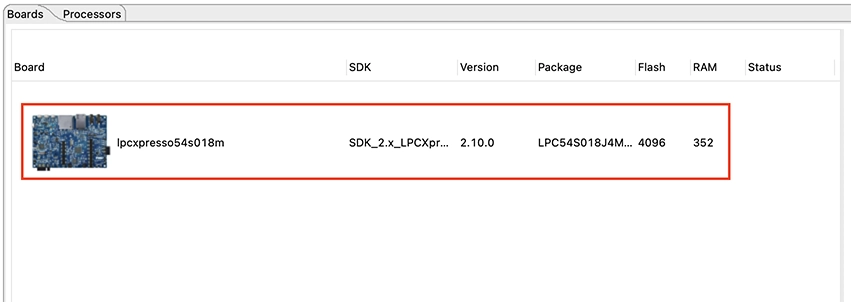
- Once the wizard has finished, you should see the SDK has been installed
- Press
- Choose
Debug As -> MCUXpresso IDE LinkServer, to build and flash the application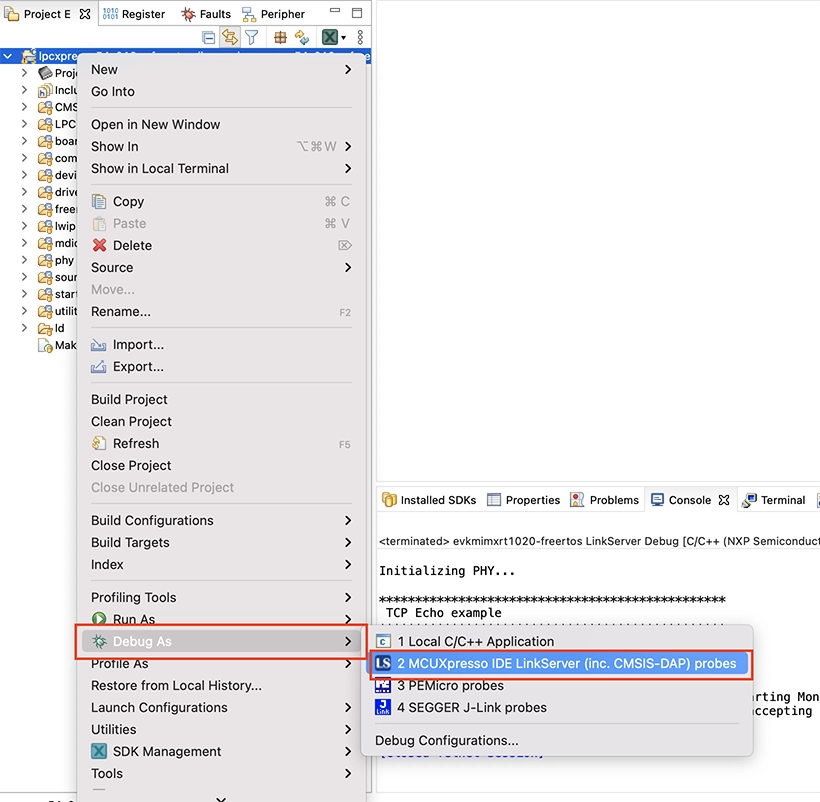
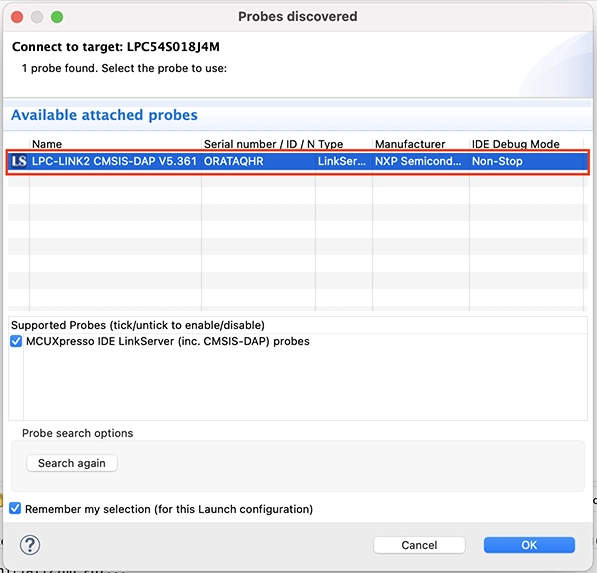
- You can be asked to choose the board to use
- After a successful building and flashing, the execution will pause at the beginning of the
mainfunction, chooseRun -> Resumeto continue.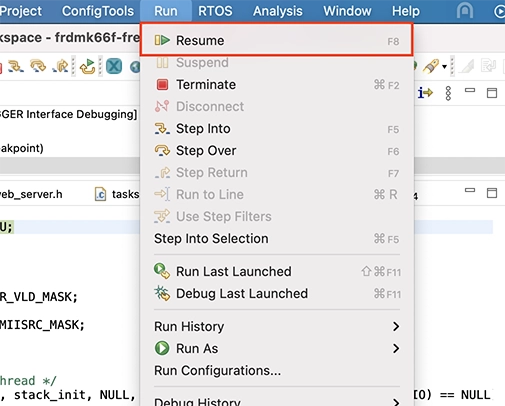
- Switch to the
Consoletab to see the example output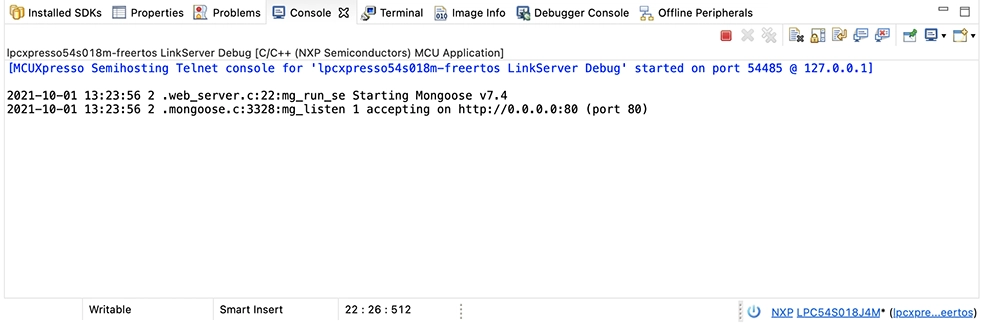
- Once the LED starts to blink - navigate to the board address to see the "Hello, world!" page
Custom application
In order to create your own Mongoose-enabled application you have several ways:
The obvious way, is to add the required functionality to this example. The sample includes all standard HAL Drivers. As you can see in the
source/web_server.cfile, a HAL function is used to turn on an LED. In the same way, you can have access to all the HAL functions.If, for some reason, you can't use this example as a base (e.g.: you have your own big project to which you need to add Mongoose), you can do the following:
- First of all, if your project uses
Redlibconsider switching toNewlib(orNewlibNano) -Redliblacks some functions and Mongoose functionality can be limited. - If your project uses
NewLib- enable float usage for printf (Properties->C/C++ Build->Settings->MCU Settings->Enable print float)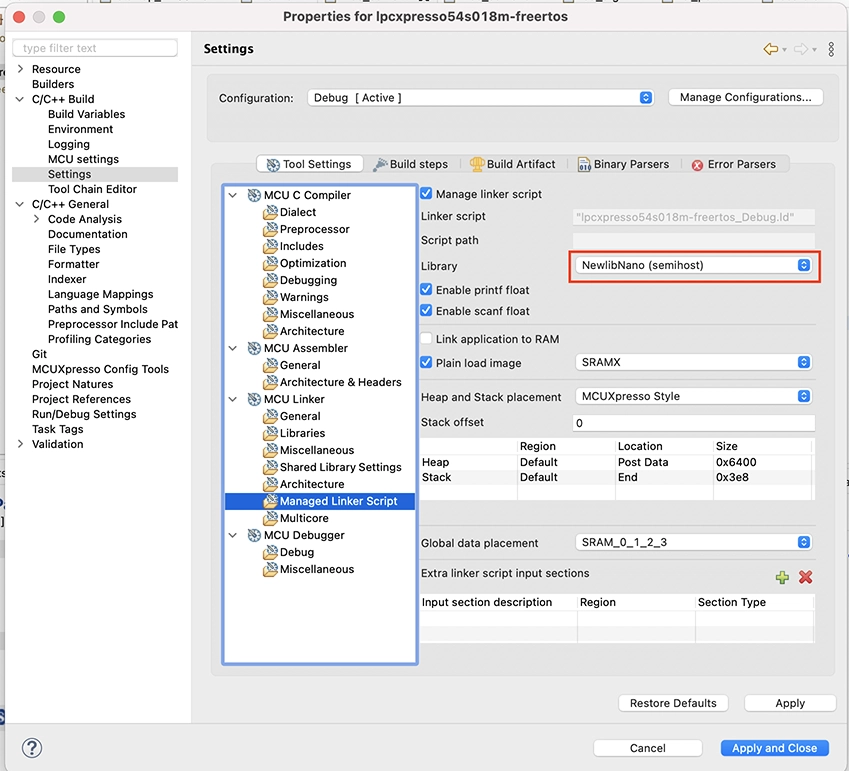
- Add FreeRTOS and lwIP to your project and write (or copy from this example) initialization code
- Add the
mongoose.c(and.hif you want) file(s) to your project - Add Mongoose-specific configuration flags
- Add the following defines in the
lwipopts.hfile:#define LWIP_SOCKET 1 #define LWIP_POSIX_SOCKETS_IO_NAMES 0 #define SO_REUSE 0 - Add
MG_ARCH=MG_ARCH_FREERTOS_LWIPto the preprocessor symbols (Properties->C/C++ Build->Settings->Preprocessor)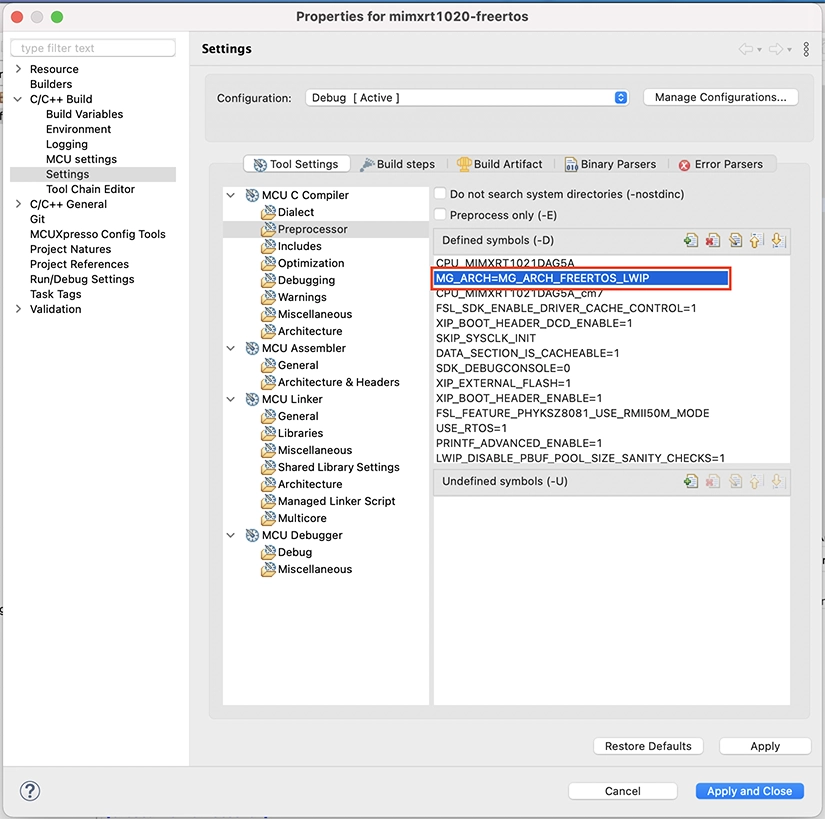
- Done! Now write code similar to that in
source/web_server.c(read Mongoose documentation) and let the magic begin
- First of all, if your project uses
Modify SDK example
If you want to evaluate STM and Mongoose as fast and simple as possible,
but you have a board that is not covered by any of our examples and tutorials, try to use the lwip_tcp_echo_freertos example: it supports a lot of boards.
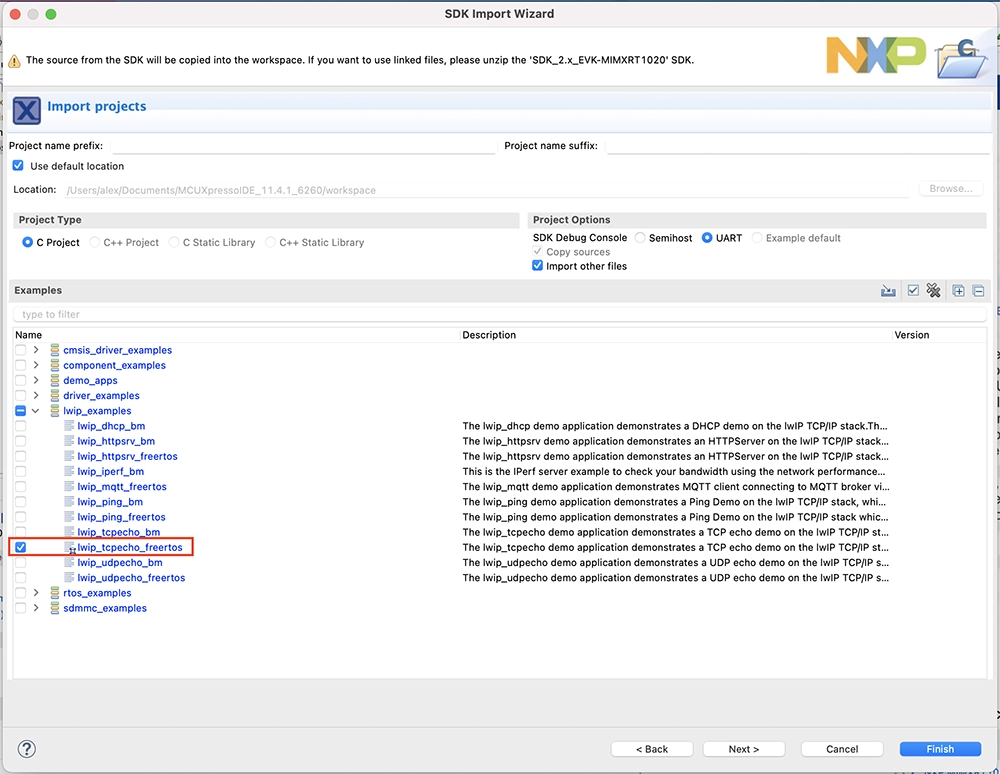
- Copy the example to your workspace, choose
Newlibwhile importing - Add
mongoose.candweb_server.cto your project - Add the same Mongoose-specific configuration flags as described at the Build your own application section
- Comment out the
tcpecho_init();line in thestack_initfunction and callmg_run_server()instead - That's it! Your application should build and run Mongoose.