


Arduino + W5500
Overview
This tutorial demonstrates how Mongoose Library can be used on an Arduino-supported board with the addition of a W5500 chip, using Mongoose's built-in TCP/IP stack.
- Uses the Arduino IDE
Below is a general process outline:
- The board IP addressing will be provided by a DHCP server.
- Build the example (see below) and run it on a development board
- The firmware initializes the network
- After initialization, the application starts Mongoose's event loop
- Mongoose obtains an IP address and prints it on the serial console
- Open your web browser and navigate to the board IP address, you should see "ok"
Board options
In this tutorial we use de Seeeduino XIAO board. You can use any other board as long as it has enough flash and RAM.
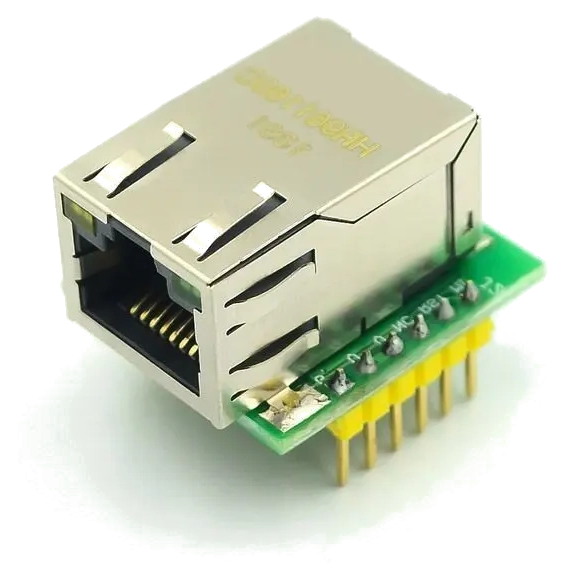
mini W5500 add-on
| W5500 | Seeduino XIAO | ||
|---|---|---|---|
| 1, 2, 12 | GND | GND | 13 |
| 3 | MOSI | D10/MOSI | 11 |
| 4 | SCLK | D8/SCK | 9 |
| 5 | SCNn | D3 | 4 |
| 7 | MISO | D9/MISO | 10 |
| 10, 11 | 3.3V | 3V3 | 12 |
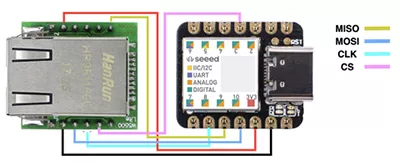
The XIAO, powered from USB, will provide 3.3V to the add-on board through its built-in regulator
This is a typical connection:
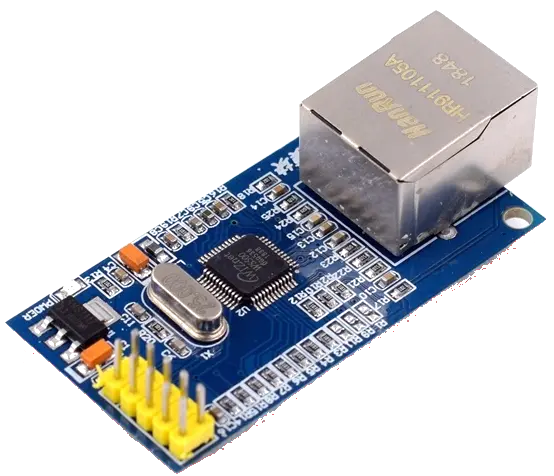
W5500 add-on
| W5500 | Seeduino XIAO | ||
|---|---|---|---|
| 1, 7 | GND | GND | 13 |
| 2 | SCLK | D8/SCK | 9 |
| 4 | SCS | D3 | 4 |
| 6 | MOSI | D10/MOSI | 11 |
| 8 | MISO | D9/MISO | 10 |
| 10 | 3.3V | 3V3 | 12 |
With this wiring, the XIAO, powered from USB, will provide 3.3V to the add-on board. You can also power this board with a 5V source, which you can also take from the XIAO. However, good practices dictate that you add series resistors on every signal connection, as the microcontroller and the W5500 will have different 3.3V power supplies that will not match. So, we recommend you follow the wiring suggested above.
Other boards
If you choose to use any other board, get the proper pins for your SPI interface, mimic the wiring above, and change this line in w5500-http.ino accordingly:
Build and run
- Follow the Build Tools tutorial to setup your development environment.
- Clone the Mongoose Library repo and open the example directory
git clone https://github.com/cesanta/mongoose cd mongoose/examples/arduino/w5500-http/ - Plug your board and connect it to your Ethernet network
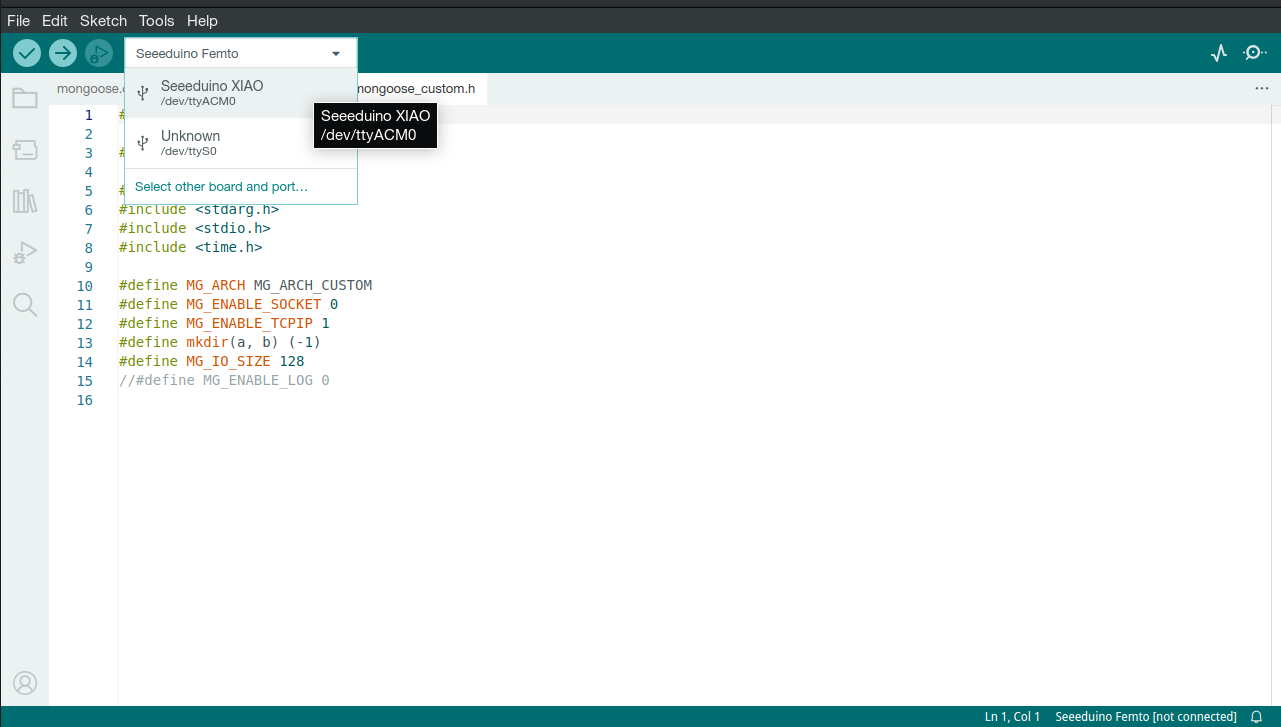
- Open the Arduino IDE, select board and port; you will probably have to install this board support package if you haven't used it before
- Open the sketch file, verify/compile the sketch, and upload it to the board
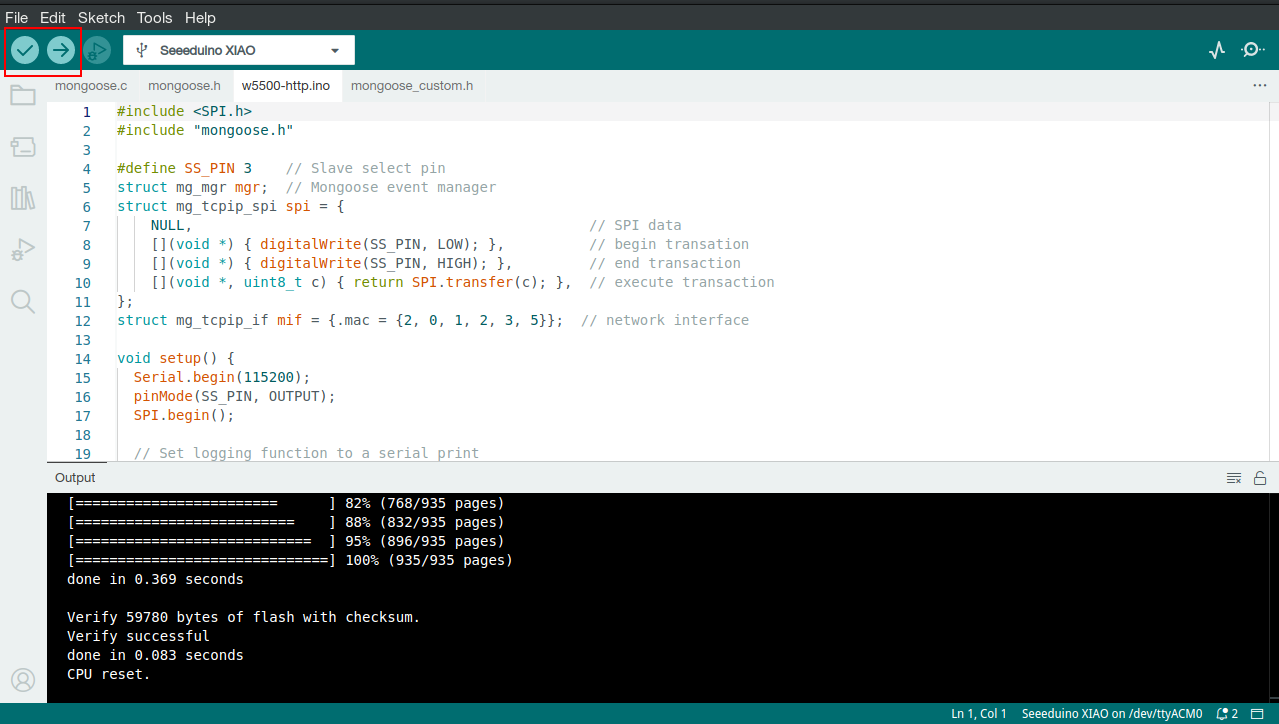
- Once the download finishes, open the serial monitor
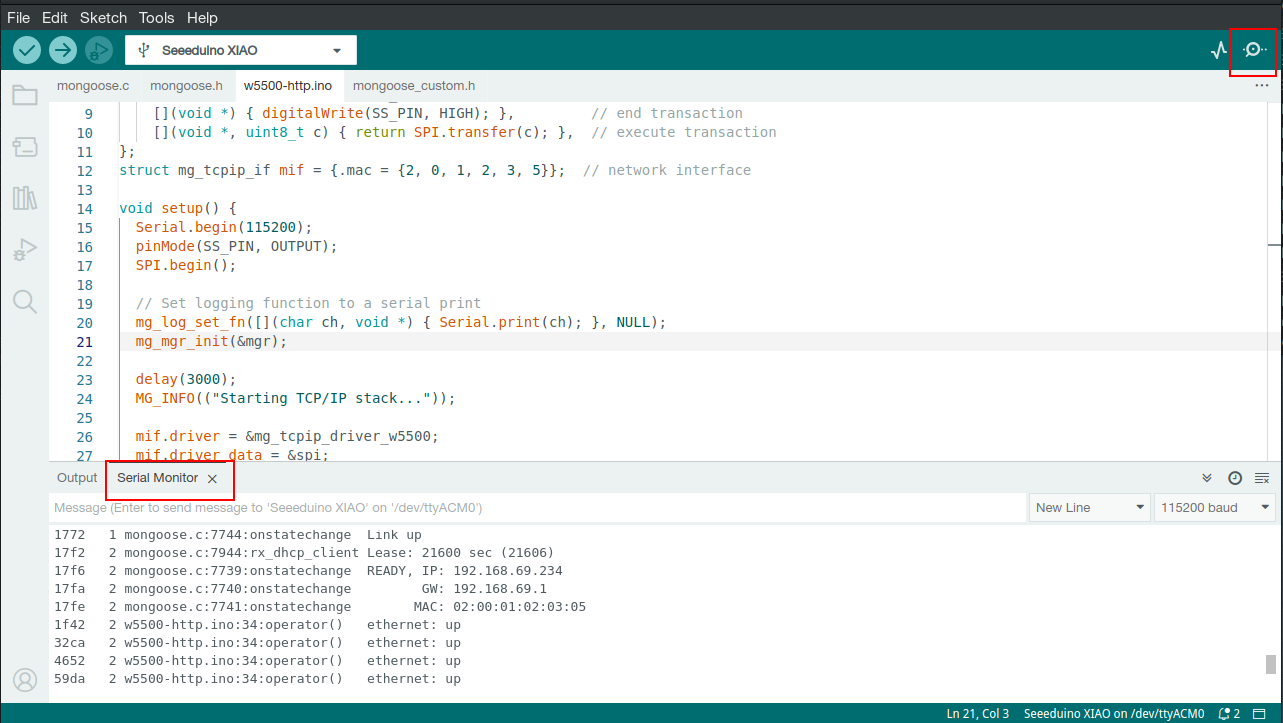
- Now start a browser on
http://IP_ADDRESS, whereIP_ADDRESSis the board's IP address printed on the serial monitor
Compilation options
MG_ENABLE_TCPIP=1- enables the built-in TCP/IP stackMG_ARCH=MG_ARCH_CUSTOM
These are grouped in the file mongoose_config.h. Here we also add the necessary include files to compile on the Arduino platform.
Sketch overview
This example can be divided in the following blocks:
- Initialize the microcontroller
- Initialize Mongoose
- Initialize the networking stack
- Run Mongoose
Initialization
We call Arduino functions to initialize the MCU, stdio, and the SPI peripheral we are going to use:
Mongoose initialization
Then we initialize Mongoose, this is no different from what we always do in any example; though this time we also setup the log to use the Arduino serial print function:
There is also a timer that we use to blink the LED and print the link stats
For more information on timers, check the timers tutorial.
TCP/IP initialization
The TCP/IP stack has to be enabled to be compiled in, and so Mongoose will work in association with it. This is done in the mongoose_config.h file by defining MG_ENABLE_TCPIP=1.
Then this networking stack has to be configured and initialized. This is done by calling mg_tcpip_init() and passing it a pointer to a struct mg_tcpip_if. Inside this structure:
- have pointers to a
struct mg_tcpip_driverand any extra data that it could need. - For DHCP: set
ipas zero - For a static configuration, specify
ip,mask, andgwin network byte order
In this example we use DHCP, but you can set a static configuration if you want:
Some drivers, as you have probably noticed, require extra data. In this case the W5500 driver needs to know which functions to call to perform SPI initialization and transfers, so we included pointers to those functions we described above
Run Mongoose
Then we run Mongoose. This is no different from what we always do in any example, though note that it should be run after network initialization. The logic is standard: initialize the event manager (as we already did), start a listener, and fall into an infinite event loop:
SPI low-level functions
We provide a basic set of functions to do transactions, that is, a couple of functions to begin and end the transaction (enable and disable chip select) and a third function to transfer a byte (send one, receive one, simultaneously). These are of course wrappers to Arduino functions: